Tuesday, February 25, 2014

I'm going to the Temple and I'm gonna get Healing

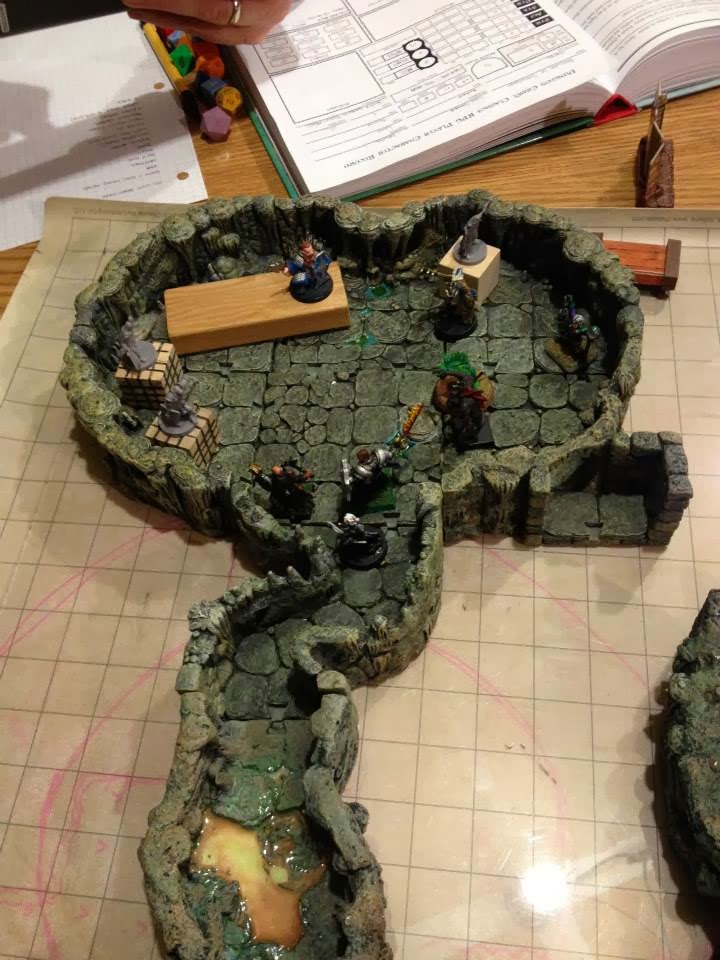
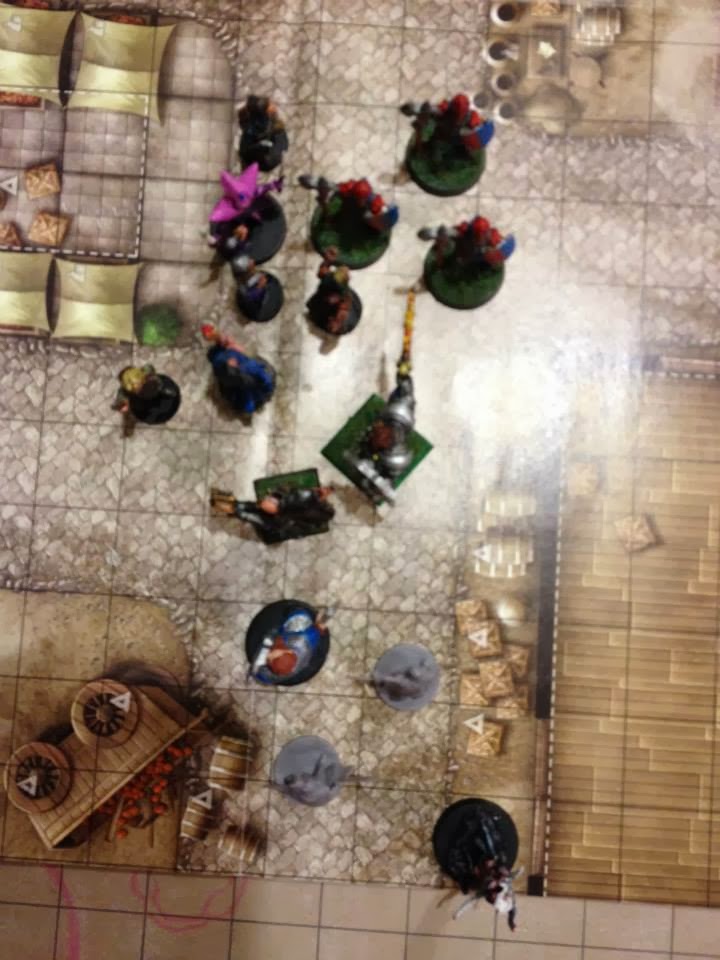
One issue that came up in last Friday's Dungeon Crawl Classics game is that of going back to town and going to the temple for clerical healing. It's not covered in DCC so I tried to fall back on DCC's inspiration: D&D. I remembered seeing some guidelines for prices somewhere in the Dungeon Master's Guide, but in the heat of the game I couldn't find it. At the time, I spot-ruled a price of 400 gold pieces, equivalent to the value of a potion of healing.

Later, after the game, I found the section in the original DMG for the price of clerical healing spells.

It's 100 gold for a healing spell.

So, at its simplest, pay 100 gold, get a lay on hands.

However, I wrote this up to provide something a little more detailed. The following rules are meant to provide some additional realism and verisimilitude to the setting. It's little things like this that make the setting feel like a real world.

What the players need to realize is that their characters are not the only people in town who want/need healing, and that there are only so many clerics of level in the temple.

In our campaign, most of the characters worship or pay homage to Justicia, the goddess of justice and mercy.

In Thither, the temple of Justicia is right across the street from a hospital, built by Bo-Mont.
17. Temples to Justicia and Bilgelik. These two new peripteral* temples featuring dozens of gleaming marble columns were built in the last twenty years by wealthy merchant and philanthropist Bo-Mont Oacha.. They are temples to Justicia, Goddess of Justice and Mercy, and Bilgelik, God of Wisdom and Prosperity. The priests and acolytes of these temples endeavor to offer succor for the sick and poor. Their progressive philosophy is very unpopular with the established nobility of the Patricians who occasionally hire mobs of thugs to attack and vandalize the temples and their worshippers.

*peripteral - (of a building) having a single row of pillars on all sides in the style of the temples of ancient Greece.

18. Hospital. Philanthropist Bo-Mont Oacha also constructed this hospital and hired chirurgeons and healing priests of Justicia to tend the wounded gladiators of the arena. The hospital also serves as a school for new healers and chirurgeons.

So, your characters are injured and your own priest is out of healing. You decide go to the hospital (18). You get in line, take a number, and wait in the waiting room for a priest to see you. 

The temple of Justicia has one 4th level priest (Bogot), one 3rd level priest (Ota-Ram), two 2nd levels (Zaki, Kibogo), and three 1st levels (Phaisho, Aie-le, Hachugyu). Each priest takes a turn offering prayers of healing for the sick and injured for two hours each day.

Roll a d12 to determine which priest is on duty today.
  1. Bogot (4th level)
  2. Ota-Ram (3rd level)
  3-4. Zaki (2nd level)
  5-6. Kibogo (2nd level)
  7-8. Phaisho (1st level)
  9-10. Aie-Le (1st level)
  11-12. Hachugyu (1st level)

Next you roll 1d16 to see where you are in line. You have to wait 10 minutes for each person in front of you. If you roll 12 or higher, you are too late. You'll have to be content with herbs, medicines, poultices, leeches, and chirurgery (+1 Hit Point for the day) and come back tomorrow.

If you get in, the priest makes healing checks for each person in front of you. The priest will continue to pray for each person in line until they receive healing, meaning their Disapproval may increment by the time they get to you.  The bad news is that you may not get healing. The good news is that you are only expected to pay a tithe of 100 gold pieces if you actually receive healing. If you do not receive the healing, you are not obligated to offer a tithe.

Example:
Absalom is injured and is taken to the temple.
I roll an 11. Hachugyu is on duty today.
Absalom is third in line!

Hachugyu sees to the first person and rolls a 16+1=17. Hachugyu lays on hands for 3 hit dice of healing.

Hachugyu moves to the second person in line. He rolls a 6+1=7. Fail. Disapproval is incremented by 1 to 2.
He tries again: He rolls an 8+1=9. Fail. Disapproval is incremented by 1 to 3.
He tries again: He rolls an 11+1=12. Success! Hachugyu lays on hands for 2 hit dice of healing.

Finally, he comes to Absalom. Chit chats for a bit, asks him where it hurts, etc. He lays his hands on Absalom and offers a prayer to Justicia.
He rolls a 5+1=6. Fail. Disapproval is incremented by 1 to 4.
He tries again: He rolls a 3+1=4. DISFAVOR! 3d4 = 5: Hachugyu must undergo the test of humility. For the remainder of that day he must provide foot-rubs, cook dinner, etc. He's also at -10.
He'll try one more time: He rolls a 4+1-10=-5. ANOTHER DISFAVOR! 4d4 = 5 again. His ability to lay on hands is severely debilitated at -20.
Absalom is not going to get any healing today. Hachugyu tried, but apparently Justicia just has it in for Absalom today.

Sunday, February 23, 2014

"Whither Thither?" Chapter 7 of the Xanthus River Campaign

Our party consists of:
Valerius (Level 1 Warrior)
Absalom (Level 1 Cleric)
Gwen (Level 1 Elf)
Nip (Level 1 Cleric)
Babu (Level 0 Man-at-Arms)
Jack (Level 0 Man-at-Arms)
Shau (NPC)

When we left our intrepid band, they had reached explored the first floor and cellar of the abandoned and supposedly haunted house of Saltmarsh Manor. Behind a secret door in the wine cellar, they found a large room being used as quarters and barracks by pirates, but as yet encountered no pirates. Exhausted and weary of further encounters, they slept the night in the abandoned study on the first floor. After fending off a late-night incursion by goblin explorers, they woke the next morning refreshed.

At dawn, the party decided to send Nip, Babu, Jack, and Shau back to Thither, a 2 hour hike away, to secure proper lodging and to keep Shau safe and out of the way. Soon afterwards, they were surprised to see Gwen, who had followed them from Wince, where they had left her for dead. After a wary examination and test to ensure Gwen was not a zombie or vampire, they proceeded. 

The party returned downstairs, past the pained screaming spell placed upon the top of the stairs to the cellar, past the decaying body of the knight whose armor Valerius now wore, and into the barracks, which was empty. 


After exploring the barracks they entered a smaller room belonging to a leader. Valerius found a locked box hidden under the bed. Smashing open the box sprung a trap, exploding bright blue eye all over Valerius and half the room, causing Absalom to collapse in paroxysms of laughter. Within were discovered five potions and some coins. In addition, Gwen found a spell-book and a long overcoat.

Another door was sealed from the outside and marked "DANGER" in chalk. This room was left unopened. 

Gwen easily found another secret door leading to an underground passage and some caves. 


The party explored the caves and walked under some dripping corrosive slime. Luckily, Absalom was able to neutralize the slime with a miracle from the goddess Justicia.

They soon found a cavern containing several cages. Within the cages were imprisoned slaves, recently captured from the nearby farms, a few had recently traveled with the party from Wince. Guarding the slaves were three lizard-men from the Screaming Swamps and a man in the robes of a wizard. 

The wizard, surprised by the intrusion, called out, "Who the hell are you? Ah-HA! You are wearing my coat! And YOU are covered in blue ink! So my trap worked and you have been caught red-handed stealing my property! KILL THESE INTRUDERS!!"


A fight ensued. The lizard-men were killed, as was the wizard, who died after two failed casting attempts. Absalom took a great blow to the head, reducing his mental faculties and nearly killing him. Gwen, likewise, was nearly killed. Unfortunately, due to Absalom's handicap, the party was bereft of healing. 


The captives were freed. They said others were recently taken aboard the slavers' ship and that they were coming back for the rest. Among the captives were the dwarf named Sausage, Kern the corn farmer, and Rings the animal trainer.

Soon afterwards, voices came from a deeper passage. Fearing discovery, the party fled. Voices, having found the bodies of the wizard and the lizard men, cried out behind them, giving chase. 

The party made its stand in the barracks, creating a choke point at the secret door. 


Valerius and two of the newcomers fought valiantly at the entrance against three pirates. Absalom threw a clay pot of oil on the pirate and then set him aflame. The pirate fled down the stairs, dying. A second pirate fled in fear. The third pirate fought to his end, having been killed by Valerius.

Weary of their brief encounter, the party decided to return to Thither. It was now only two hours past sun-up.  They arrived at their lodging and met Shau and the others only thirty minutes after them. 

The group sought healing at the temple of Justicia but were unable to afford the tithe. They decided to take care of business, exchanging coins and gems at the money-changers for scrip to be used for large purchases within the city. 

On their way back, they encountered a small group of town guards harassing some neophytes of Justicia at the Old South Gate. The neophytes were carrying recently purchased medical supplies back to the temple. With them was a wealthy-looking merchant with his two bodyguards. The town guards pushed and shoved the young neophytes, knocking their load to the ground. 

Valerius, wearing the tabard of Justicia, and Absalom, being an acolyte of Justicia, intervened on the neophytes' behalf, with Sausage, Rings, and Kern backing their play. They stood up to the guards. The guards decided to back down and let them pass. 


The wealthy merchant introduced himself as Bo-Mont Oacha, wealthy merchant and patron of Justicia. He had recently purchased these supplies to provide to the poor and needy people of Thither. He explained that he was a wealthy philanthropist of humble origins who wished to give back to the oppressed of the city, and that the city establishment did not appreciate his efforts to redistribute wealth and power. 

He thanked the party and offered his villa to them for the evening, and invited them to join him for lunch at midday. 

After lunch, the rest of the day was spent conducting business, having potions identified, loot appraised, etc. 

On their way back to the villa, they encountered a mob riot at the Old South Gate. A mob of the poor had heard about the incident this morning and were seeking revenge against the guardsmen and a riot had erupted. Several of the guardsmen saw the party and peeled off to chase them down. The party fled and was able to make it within the safety of the villa gates. 

They spent the night in the villa but never saw Bo-Mont. They woke the next morning and Absalom promptly healed everyone of their injuries. 

They broke their fast with Bo-Mont and explained that they were headed back to Saltmarsh Manor. Bo-Mont expressed surprise for the manor had been abandoned twenty years and was now haunted. Also, slavers were raiding the area and that the party should be careful. The party mentioned the slavers they encountered and Bo-Mont told them that there was a bounty on the slavers and a reward for each captive rescued. 

When asked about the house, Bo-Mont said that the house once belonged to a powerful alchemist named Yithother, who was searching for the secret of the Philosopher's Stone, the ability to turn base metal into gold. The stories say that the old alchemist up and disappeared overnight twenty years ago. The house was utterly abandoned. 

On their way out of the city, the party was forced to make way for a large wagon carrying pleasure slaves from the south. After it passed, one of the slaves was somehow able to kick open the locked door and escape into the bazaar, chased by two guards. The party chose not to intervene.

Once more at Saltmarsh Manor, they decided to explore the top floor. In the east wing, they quickly dispatched two large spiders in a fireplace. Jack, however, was bitten by a spider and paralyzed. In the next bedroom, they found a middle-aged man bound and gagged. Kern the corn farmer went to his aid but fell through the floor and was injured. Rings the animal trainer took a different route and freed him.


The man was named Edmund. He claimed to be Master Yithother's valet and personal assistant. He said that a few days ago, he awoke standing in a closet and that the house was overrun by miscreants and ne'er-do-wells. He was quickly bound and left in this room. He validated that Shau was the master's niece. He also worried about the master's young nephew, William. He hasn't seen either in the last six days, and he is terribly confused and worried as to the current state of the manor.

Upon exploring the west wing, Rings was killed when he investigated a coat which turned out to be infected with a noxious yellow fungus. 

In the attic they came across four bat-winged blood-sicking creatures known as "Stirges". One of the creatures killed Kern before all four creatures were destroyed.


After that, the party prepared itself to re-enter the cellar.

TO BE CONTINUED!

Afterthoughts

Two things I wished I'd have done differently:
  1. I changed the hyenas in the module to lizard-men. At first they were going to be fish-men, but I changed to lizard-men at the last minute. Now I wished I'd have made them frog-men. I love frog-men!
  2. I should have had the Illusionist spellburn! He's an NPC, he doesn't need those stats! BURN THEM! But I forgot all about that rule. As a result, none of his spells got off and his death was kind of lame. 
Also, one of the key points of the plot is that the pirates are smuggling goods in the dark of night. I just realized that I had my pirates doing their work after dawn. I should have had all ten pirates asleep or at least resting in the barracks. MISSED OPPORTUNITY!!

On the successes side, once again the Cities source book was invaluable! Every encounter in the city was an unplanned random encounter that I was able to seamlessly integrate into the story!

Encounter 1: the party comes across a fight happening between two factions. 

This allowed me to introduce Bo-Mont and his conflict with the patricians of the city. 

Encounter 2: the party encounters a mob riot and is mistaken by both sides as allies for the other side. 

This just worked perfectly to further illustrate the tensions of the city and made it a very real place.

Encounter 3: they witness a slave escaping. Ironic given the storyline with the slavers in Saltmarsh manor, but the bottom line is that owning and selling slaves is legal in Agartha, but capturing Agarthans to sell as slaves is illegal. Anyway, it was totally up to the players to intervene or ignore, and they chose to ignore. Nevertheless, the escaped slave will return!

I should also point out that this week we were joined by special guest star Jeff who was able to play Sausage, Rings, and Kern. Jeff's portrayal of Sausage the Grossly Overweight and Overbearing Dwarf was inspired and hilarious!

Sunday, February 9, 2014

The Seven Sources of Magic

Agarthan Magic derives its power from the seven supernatural planes of existence, extra-dimensional realms parallel and coterminous with our own. There are various points of access between our world and the seven worlds of magic, allowing creatures, gods, entities, and even the player characters to cross back and forth.

The seven sources of magic are as follows:

  1. The Counterworld
  2. The Otherworld
  3. The Underworld
  4. The Overworld
  5. The Shadowworld
  6. The Innerworld
  7. The Outerworld
The Counterworld, or Mirror Universe, is a parallel dimension to our own. Everything and everyone that exists within our world exists within the Counterworld, only there it is a twisted and evil parody of our existence. The Counterworld is the source of anti-magic and meta-magic spells. The Counterworld can be accessed through magical mirrors and reflective pools.

The Otherworld, also known as Faerie, Fairyland, Elfland, Tir-na-Nog, and by other names, is a realm of thought and energy. There is no physical matter in the Otherworld. The Otherworld is the source of magical animus, creativity, and energy. It is the source of all natural magic and life magic. It is from the Otherworld that elves and fairies come. In our world, these normally ethereal spirits take on mortal form. The Otherworld can be accessed through faerie circles, stone circles, and sacred groves in ancient forests. 

The Underworld or Netherworld, sometimes called Hell, Tartarus, or the Abyss, is a volcanic land of earth and fire, bottomless chasms, and vast chambers. It is a realm of pain and torment and is the source of pain-based magic and diabolism. The Netherworld is the realm of dark gods. Demons, devils, and asuras hail from this accursed place. The souls of evil beings are collected by the gods of this realm to feed their metaphysical appetites. The Underworld can be accessed through certain deep fissures and caves or through magic demon-circles and blood sacrifices.

The Overworld, known by some as Heaven, Olympus, Elysium, and other pleasant names, is an ethereal realm of light and goodness. It is a realm inhabited by good gods and demi-gods and is the home of angels, devas, and saints. The souls of good beings are rescued by the gods and servants of this realm to spend eternity under their protective authority. The Overworld is the source of all holy miracles, true reincarnation resurrection, and healing magic. The Overworld can be accessed through magic circles and portals or after performing lengthy ceremonies.

The Shadowworld is known by some as Limbo, Purgatory, Hades, or the Shadowlands. It is a grey misty realm of nothingness. The souls of neutral beings are reborn into this realm to spend eternity. The Shadowworld is the most difficult realm to access with no known entrances from our world. Only beings native to one of the other magical realms may enter the Shadowworld. The Shadowworld is the source of all necromancy and darkness magic.

The Innerworld, also called the Dream World or the World of Illusion, is created by the shared unconscious of all living beings. It is a realm of dream, imagination, and fantasy. It can be accessed through dream or the consumption of magical elixirs and drugs. A few portals exist beneath giant trees deep in ancient forests. The Innerworld is the source of all illusion, sleep magic, and wish magic.

The Outerworld, or Astral Plane, is a strange realm of chaos at the edge of existence. The Outerworld surrounds all the other magical planes, touching each of them as well as our own, and stretches into infinity. The deep recesses of the Outerworld is the home of aliens, the Outer Gods, and powerful entities such as Ulutuk and the other Ancient Ones. The Outerworld is the source for all travel magic, astral magic, and stellar magic.

Monday, February 3, 2014

"The Sinister Secret of Saltmarsh" Chapter 6 of the Xanthus River Campaign


First bit of business. During the carnage that was the near TPK last week, everyone forgot that you could spend Luck points to modify your death save. I offered them a chance to retroactively do that. Plus, it was a very unfair scenario and one I was not happy with so I ret-conned a little bit of what happened.

In that light, Nip the turnip farmer did not die. He regained consciousness in the cellar piled with several other bodies waiting for interment. He was assumed dead but had somehow survived! 

The root cellar under the barn showed no evidence of cult activity, nor any sign of a giant skeletal snake demon! It was nothing more than a dark root cellar. Emerging into the light, Nip was told that there was a fight between some out-of-town merchants in the cellar and some smugglers over some bad deal or something. The smugglers were all dead and the merchant and his entourage were getting ready to leave town on their boat. He rushed down and rejoined the boat crew and off they went. 

There was no mention of a cult or battle with the snake demon. It was an odd omission. Was it all a nightmare? An illusion? A cover-up? And what of Gwen the Elf? Her body was nowhere to be seen among the dead. Definitely a mystery for a later date! (and the seed for a future adventure)

Our party now consists of:
Valerius (Level 1 Warrior)
Absalom (Level 1 Cleric)
Nip (Level 0 Turnip Farmer)
Babu (Level 0 Merchant)
Jack (Level 0 Cheese maker)
Shau (NPC)

When we left our intrepid band, they had reached Thither and journeyed on through the night to the mansion of Saltmarsh on the coast of the Smaragdine Sea, where Shau promised a wealthy uncle, a reward, a warm house, fine food, and a comfortable bed in which to sleep. 

Unfortunately, the grounds were overgrown by what look like twenty years of neglect and the house was a decrepit shambles.

WHAT IS GOING ON HERE??

The party entered the house, asking Shau about the layout and nature of the rooms. Shau admitted that she was feeling disoriented and that her memory was mysteriously hazy, but that living areas were in the east wing, studies and libraries in the west wing, and kitchen and servants quarters in the north wing, bedrooms were upstairs.

The team went west, carefully exploring each room in turn. They found a study with a desk and an iron stove. Within the desk they found an unmarked potion. They noted the room as a possible place to rest for the night. Next they explored a living area which had obviously been looted long ago. When approaching the north end of the room, they were startled by a loud ghostly voice hearalding their imminent doom! Several members of the party were frightened out of the room. In a pile of debris they found a large gold hoop earring. The next room was a library, in which they found a few treatises on magic and alchemy. 


Having finished the west wing, they took on the east wing. They found two empty living areas, devoid of interest.


They then entered the north wing. In a drawing room, while searching around the inside of a chimney, Nip was attacked by a large spider the size of a small dog. The party quickly dispatched the arachnid horror. Inside the chimney was a metal box holding a fancy ring.


Next they found the dining room, in which nothing of import was discovered.

In the kitchen they encountered five large aggressive centipedes which scurried from rotted cupboards. In the scullery they found stairs descending to the cellar. When they approached the stairs, they were once again met by a frightening ghostly voice screaming in pain.


At the bottom of the stairs they found the wine cellar. All of the wine had long ago been eaten. In the center of the room was the body of a warrior in plate mail, dead 3 weeks. While investigating the body, Valerius was swarmed by 7 rot grubs! The rest of the party applied fire to the beasts, burning Valerius in the process. Afterwards, Nip found an emerald hidden in the dead warrior’s boot.


While searching the cellar, they noted that the fireplace was made of cemented riverbed stones. A few of the stones appeared to have been chiseled out. Very odd. It was then that they noticed that the back of the fireplace was made of plywood. Even odder!

The plywood easily fell when pushed, revealing a passage through the fireplace. Beyond was a large space filled with beds, barrels of grog, food, and other supplies. It was obviously a well-used living area for up to ten men! Nervous of their chances, the party backed out and returned upstairs to rest.

They nestled down in the study with the door closed. Absalom cast Detect Magic on the party, making note of Valerius' dagger, newfound plate armor, and glowing globe as well as Nip's ring and potion. Afterwards, they went to sleep. In the middle of the night, Nip, who was on guard duty, heard the shuffling and murmuring of voices in the hall. The sounds came closer, then tried to open the door. He quickly woke the others. They opened the door to reveal a small group of four goblins! One goblin was immediately dispatched. At the sight of his dead comrade, another goblin fled. The remaining two goblins stayed and fought. When the second goblin was killed, the forth goblin fled in terror. The goblins, as it happened, were simply scavengers who happened upon the house and were exploring it themselves.

Upon completion of the melee, Nip heard the call of Yigdrassl, the Goddess of Nature. He has decided to become a druid (Level 1 cleric)!

The party returned to their rest.

Next week, the party returns to the hidden cellar chamber, and g…g…g…ghost pirates!!!

Afterthoughts


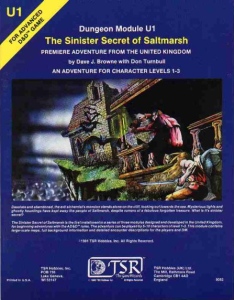
I'm running the AD&D module U1: The Sinister Secret of Saltmarsh, with some significant story changes. The 1st level monsters are very uninspiring. A spider! Five centipedes! GASP! The rot grubs were a little scary. I don't think any of my players, who are long-time D&D players, had ever encountered rot grubs. I was a little confused how they worked at first. Do they attack? They have an AC of 9 (11 in DCC). Does that mean you have to hit them to apply fire damage? In the end, I ruled that you had to hit them, but just in case I doubled the number of rounds before Valerius would die.

Which leads me to my other failing: turns, turns, TURNS!

Turns != Rounds. Turns equal 10 minutes. Why am I so bad at remembering that distinction! Detect magic lasts two TURNS = 20 minutes, not 20 seconds. Rot grubs kill their host in 1-3 TURNS = 10-30 minutes, not 10-20 seconds.

It's very old school, and I know and understand the distinction, but damned if my brain keeps forgetting.

Similarly, I kept forgetting to invert the armor class of the AD&D monsters. I saw the goblin AC of 6 and thought "wow! pushover!" then I suddenly remembered, "No! 20-6 = a DCC AC of 14!"

I must remember that next week when the party takes on the pirates and their allies!

Friday, January 31, 2014

A Visual Guide to Thither


Thither is a medium-large city of 15 thousand permanent residents and an additional thousand or two transient merchants, sailors, and laborers on any given day depending on the season. Thither is located about four miles from the mouth of the Xanthus river across from the Crying Swamps. Here the river is sluggish and meandering, almost a marshy tidewater.  The swamp itself extends for twenty miles of flooded jungle, marshy grasses, and choking weeds with a multitude of twisting channels.

Thither was constructed by refugees of the doomed city of Sinopia when that metropolis was destroyed one thousand years ago. At first, Thither was nothing more than a fishing village, a collection of hovels, home to five hundred survivors of the celestial holocaust. In time, traders from up-river began to return. Then ships from far off ports along the coast of Agartha, as well as far-off lands like Atlantis, Lemuria, Hyperborea, and Mu, began to stop in Thither. In time, Thither became prosperous and wealthy. The nobility of Thither believe they owe their success to Altina, the golden goddess of the river, and to annual human sacrifice to Bobugbubilz, the god of the swamps.

Like most of the towns and cities of the Xanthus river valley, Thither is ruled by a hereditary Archon who consults with a city council composed of nobles and influential commoners known as Patricians. The current Archon is named Kepha. Kepha is an overweight man in his forties, balding with a well-trimmed beard. Kepha has six wives and eighteen children. Kepha is a practical man but he has little strategic vision. He tends to manage the city one crisis at a time. Kepha is friendly, warm, and generous to his friends. He dislikes having enemies and tries to win opponents over rather than compete with them. Although Kepha is intelligent and astute and brilliant at forging compromises and resolving disputes, many of the patricians consider him weak and tend to work schemes behind his back. This situation has led to hidden corruption within the court of archon Kepha and the city administration.

1. Docks. Wooden platforms and moorings built over the bank allow for up to eight sea-going ships or twenty-four river boats to dock at any one time. The docks are always busy with activity as stevedores load and unload visiting ships.

2. Basilica of Altina, the Golden Goddess of Wealth and Trade. Altina is the patron goddess of Thither. She is depicted as a rubenesque woman made of gold with four arms in which she carries scales, an arrow, a sheaf of wheat, and a crystal orb.

3. The Pylon. This large pylon is connected to the docks by a narrow stone bridge. The bridge prevents loosed boats from floating downriver.

4. Warehouses. The buildings in this part of town consist of warehouses, barns, and storage buildings.

5. Villas. Walled compounds belonging to wealthy patrons of Altina, all of which happen to be successful merchants and moneylenders.

6. Currency Exchange. This temple-like building is home to the impenetrable underground vaults of the money changers. Most trade in Thither is done via notes, IOUs, and scrips, which can be exchanged for currency here. The currency exchange is guarded by an army of alert well-armed guards. The subterranean vaults are patrolled by fabulous guardian beasts, traps, and sorcerous wards. 

The Academy of Eskilik. Next door to the currency exchange is the Academy of Eskilik, an institution of higher learning dedicated to studying the laws and history of the ancient Agarthan empire. The Academy often funds expeditions throughout the valley to locate, explore, map, and recover lost treasures from the ruins of the fallen empire of the golden age.

7. Old South Gate. This older gate allows access through the older inner wall of the city to the newer section beyond.

8. Hostels. Several hostels and inns in this neighborhood provide group accommodation to budget-minded transient boat crews.

9. Patricians Villas. The political elite of Thither hold the hereditary title "Patrician". Those of patrician rank  live in walled compounds near the palace of the archon.

10. Palace of the Archon. Archon Kepha lives in this marble palace with his extended family, household, and regiment of personal guards.

11. Notice Board. A large covered notice board stands in the center of the busiest plaza of the city. Here one may read the day's news, official pronouncements, wanted posters, employment opportunities, and other public notices.

12. Old Temple District. Four temples occupy this row outside the entrance to the archon's palace. Here one may offer sacrifices to seek the blessings of Tzann, the God of the Sun; Pelagia, goddess of the sea; Thumina, goddess of the moon; and the Lazy Issari, demi-goddess of insight and strategy. Each temple is administered by a high priest (Level 10+ Cleric)

13. Monastery of Ulesh, God of Peace. This large walled compound is home to 60 monks overseen by High Llama Sham (Level 9 Monk).

14. Old South Gate. This old gate is covered in bas relief carvings.

15. Tenements. This large four story building is a tenement for the servants and laborers of the city's upper class.

16. Bazaar. Dozens of awnings and tents are erected here everyday in this outdoor market filled with milling throngs, shouting merchants, barkers, exotic performers, and street food.

17. Temples to Justicia and Bilgelik. These two new peripteral temples featuring dozens of gleaming marble columns were built in the last twenty years by wealthy merchant and philanthropist Bo-Mont Oacha.. They are temples to Justicia, Goddess of Justice and Mercy, and Bilgelik, God of Wisdom and Prosperity. The priests and acolytes of these temples endeavor to offer succor for the sick and poor. Their progressive philosophy is very unpopular with the established nobility of the Patricians who occasionally hire mobs of thugs to attack and vandalize the temples and their worshippers.

18. Hospital. Philanthropist Bo-Mont Oacha also constructed this hospital and hired chirurgeons and healing priests of Justicia to tend the wounded gladiators of the arena. The hospital also serves as a school for new healers and chirurgeons.

19. Arena. The small arena of Thither seats 4000 spectators who gather to watch gladiatorial combats, executions, plays, and other performances.

20. Villas. Walled compounds for the families of successful citizens, usually merchants, artisans, and craftsmen.

21. Tenements. Large cheaply-built apartment block-style homes for the city's lower class workers and laborers.

22. Tavern Row. Nearly a dozen taverns are located on this row servicing a mixture of local and visiting clientele. Rowdy brawls are a nightly occurrence.

23. Inns. Several walled compounds provide more secure private accommodation to travelers and their animals.

24. Shops. Artisans, craftsmen, and merchants sell their services and wares from more permanent shops in this lively neighborhood.

25. Garrison and Barracks. The large fortified compound houses the town garrison while the long buildings across the street are the barracks for the troops.

26. North Gate. This gate, built at the same time as the New Outer Wall, provides access to the trail that follows the Xanthus river north to Spit.

27. South Gate. The south gate opens to the coast road which leads south to the town of Orada with side trails to Yon, the "city of wizards".

28. Outer City. These small buildings house inns and shops catering to travelers and river fishermen alike.

29. Signal Tower and Temple of Anuran, Demon-Lord of Amphibians. The fires atop this tall signal tower are used to summon the colossal demon-lord of the frogs to provide him his annual human sacrifice. This annual tradition is believed to keep the city safe by appeasing malicious god and its reptilian and ranine servants.

30. The Crying Swamps. The vast marshes and swamps were once the location of the city of Sinopia, a great port city of the imperial age. Sinopia was destroyed by divine fire over a thousand years ago, leaving nothing but crumbling flooded ruins. Today the region is haunted by eerie wailing spirits and tribes of lizard and frog men.

Wednesday, January 29, 2014

The Under-City of Duirnhold

Duirnhold was founded by the dwarfish King Duirn over 2400 years ago when an exploratory tunnel into the mountain that now bears his name revealed rich veins of Atuta Dhatu (mithril), iron, copper, gold, silver, and other precious metals and gemstones. In time, the mines and foundries of Duirnhold became one of the most productive and lucrative dwarfish enterprises in all of Agartha.  Traders came up the Xanthus river from across the continent to do business with the dwarfs, trading food, furs, textiles, and other goods in exchange for raw ore, prepared ingots, and finished products such as weapons, armor, metalwork, jewelry, and custom goods.

There are two publically known entrances to Duirnhold. The first is located on the west slope of the mountain in the town of Duirndown near the headwaters of the Xanthus river. The second is located  on the east slope of the mountain facing the desert wastes of Gazh. On this side, a long stairway descends the mountain to the desert several thousand feet below.

Anyone entering through either entrance descends down a twenty-foot wide corridor for a few hundred feet before needing to pass a checkpoint. It is here that the trade goods were inspected and the traveler recorded and given a passport. Past the checkpoint, the corridor descends another mile.
Visitors from Duirndown must cross over a bridge that spans a great cleft under the mountain. The cleft rises several hundred feet above and descends into an interminable chasm below.

 Lower Level

The lower level is the only level accessible to outsiders. It consists of five connected chambers: two Halls of Statues, the Hall of Trade, the Hall of Metals, and the Hall of Goods.

Visitors entering from either direction then pass through one of two impressive Halls of Statues, a one-hundred foot tall vaulted gallery filled with 16 colossal statues of ancient dwarfish heroes and legendary figures. The gallery is imposing and is meant to intimidate and impress visitors as they pass underneath.

Visitors then enter the Hall of Trade, a busy bustling gallery of offices where factors from the various dwarfish mercantile houses meet with visiting merchants to conduct business transactions. Visitors may be taken into the adjacent Hall of Metals or Hall of Goods to inspect the items they intend to purchase prior to completing the transaction.  The Hall of Trade also maintains houses of accommodation for visiting dignitaries. Diplomatic envoys are escorted through one of two passages to the upper level to conduct court business.

Rumors tell of secret doors that lead to hidden chambers and covert passages to restricted levels.


Upper Level

The chambers of the upper level is restricted to the dwarfs of Duirnhold. Only visiting dignitaries may enter.

The upper level consists of one large gallery connected to three smaller chambers as well as three labyrinthine networks of rooms and corridors.

The largest gallery is devoted to the royal palace and the temple to the mountain lord. This cavernous chamber rises five hundred feet and is supported by ten forty-foot wide stone columns. The south end of the gallery is dominated by a large stepped pyramid, a temple to Daenthar the Mountain Lord, chief g the dwarfish pantheon. A moat surrounds the impressive structure. Eight statues of each of the gods of the dwarfs stand against the west and east walls surrounding the temple.

The north end contains the palace of Duirn, an impressive edifice sporting two tapering two-hundred foot tall obelisks and a soaring 150-foot dome. The wide stairs that lead into the entrance is flanked by statues of Duirn's mother and father. During its heyday, hundreds of dwarfs lived and worked within the palace household and the descendants of Duirn held court in the audience chamber.


The southern gallery is 300 feet wide by 540 feet long by 300 feet high. This chamber contains the forge, a mighty furnace that taps into the very heart of the mountain. Here metal ores are melted down and separated into refined metals. During its day, the forge was filled with working dwarfs, rock crushers, blast furnaces, bloomeries, powerful mechanical bellows, crucibles, and foundries. Vents leading to the surface provided fresh air for the bellows and carried away exhaust from the furnaces. Water wheels powered by underground rivers drove the fans that moved the air through the vents.

Ores were mined far below and stored in the adjoining Hall of Ores, a 300 feet wide by 300 feet long by 300 feet high warehouse piled high with various rocks laced with metal ores. The ores were separated into distinct piles: gold, silver, copper, iron, tin, and the exotic unbreakable metal the dwarfs call Atuta Dhatu, found only in the deepest places under the mountain.

Finished metals and parts were later cleaned, polished, and assembled into weapons, armor, tools, and other devices in the adjoining workshop. The workshop is 180 feet wide by 540 feet long and 240 feet high. The workshop contained hundreds of work benches and anvils. Ores, metals, and finished goods were then transported to the Hall of Metals or Hall of Goods for trade with the outside world.

A complicated network of metal tracks connected the mines to the Hall of Ores, the Forge, the Workshop, and the trade halls below. Mine carts were pulled by mules.

The eastern gallery is known as the Hall of Workers. The Hall of Workers measures 780 feet long by 420 foot wide by 240 feet tall and is supported by 18 40-foot wide columns. In its day, the hall contained homes and dormitories to house the common unskilled workers, miners, and laborers of Duirnhold. The gallery is a network of public spaces, dormitories, private apartments, dining halls, taverns, and other residential services.

The Hall of Nobles measures 660 feet long by 300 feet wide by 300 feet tall and is supported by 9 columns. The chamber is divided into 12 private multi-story compounds, each belonging to one of the 12 noble families of Duirnhold.

The Hall of Artisans measures 300 feet wide by 480 feet long by 300 feet tall and is supported by 6 columns. This space contains the private residences of the twelve master artisans of Duirnhold. Whenever a master artisan dies, a contest of skills is held and a new master artisan is selected from the general populace.

Secret Locations

There are several secret locations in Duirnhold, including the fabled Vault of Duirn, rumored to measure 300 feet wide by 600 feet deep and 300 feet high, it is said to be filled with the accumulated wealth of thousands of years of prosperity. Its location is unknown. Other locations not shown on the maps above include the catacombs which lead to the burial vaults of the twelve noble families and the ossuaries of the commoners. According to dwarfish tradition, dwarfs are buried in their finest raiment with their most treasured possessions. These tombs are protected by deadly traps enchanted guardian statuary.

The Fall of Duirnhold

Forty years ago, the dwarfs of Duirn uncovered a lost chamber deep underneath the mountain, far down in its very roots. The chamber unleashed a primal force of evil, the titan of chaos known as Zoggolorth, buried since the dawn of time. Once freed, the evil of Zoggolorth quickly spread, corrupting everything it touched. The dwarfs built bulwark after bulwark to defend themselves from the spread of the evil, but it slowly overcame each line of defense. Eventually, the city itself fell. Thousands of dwarfs died in the final desperate battles against the Spawn of Zoggolorth. The surviving dwarfs were forced to abandon their homes and flee for their lives. The dwarfs called upon the aid of the human mages to magically seal the portals behind them, preventing the further spread of the chaos. Today, Duirnhold is sealed behind multiple layers of magical gates. Each gate can only be opened by a magical key in the possession of one of the human mages of Bhaakru.

Tuesday, January 28, 2014

Mages of Bhaakru

Illustration by Christian Conkle

The Mages of Bhaakru are an order of wizards, sorcerers, and thaumaturgists. There are 24 members of the order. Each member is a master of a specialized form of magic.

  1. Keryodel Mitchak, Master and Head Instructor for Ethereal Physiology Analytical Studies 
  2. Yondel the Injurious, Master of Destructive Proverbs 
  3. Omod the Incessant, Drover of the Howling Black 
  4. Thrice-born Guillarme, Lord of Ash 
  5. Massimo Pellipar Benari, High Adept of the Scalding Spire 
  6. Madame Corvax, Sage of the Inverse Serpent 
  7. Calla'dara the Lusty, Mistress of Manipulation 
  8. Avgred Horath, Superluminary Aetherweaver 
  9. Beetledrum the Absent-Minded, Supreme Benefactor of Accidental Mayhem Magic 
  10. Vapula, Master Alchemist of the Venerable Order of the Emerald Exodus 
  11. Possuvex the Most Puissant Magister of the Puccoon Hexes 
  12. Umtrios the Delusive, Supreme Illusionist of the Hidden Court 
  13. Fat Mongrel the Obdurate 
  14. Tramga the New, Initiate of the Fifth Shard 
  15. Feyjer Wolf, Spawn of the Protean Chaos 
  16. Svorr the Elder, Keeper of the Nth Aeon 
  17. Hailoon the Mystic, Master of the Blinded Eye. 
  18. Goram the Salamander, Master of the Soulflame. 
  19. Jessra the Knight, Master of the Warrior’s Way. 
  20. Mezzer the Ringlord, Master of the Enchanter’s Loop 
  21. Sandorex the Supernumerary, Purveyor of Ontological Ennui 
  22. Meefallanananfanganan the Metamathematical, Minister of Meteorological Mellifluence 
  23. Gaitexthe the Sporn, Disciple of Roving Gortlflexiyon 
  24. Dorex the Depraved, Sultan of 796 Succulent Sins
Given that membership is for life, the roster is surprisingly fluid. The order suffers a 11-16 percent annual turnover rate as members are killed or mysteriously disappear. 

The Mages meet quarterly at each solstice and equinox. The solstice gatherings are business related and are usually convened to deal with matters of great import while equinox gatherings are more casual social networking affairs. Individual mages will correspond, cooperate, and fraternize from time to time and certain social cliques and political factions exist between like-minded members. The Grand Magus is selected at special meetings held at each solar eclipse at the headquarters located atop Mount Mashushammu in the southern deserts of Agartha.

The Mages will also respond to urgent summons at times when the entire universe faces great peril. Smaller groups will be assigned by the Grand Magus to deal with lesser threats. Forty years ago, eight of the twenty-four Mages were tasked with saving the the dwarfish city of Duirndown from the corruption of the elder chaos titan Zoggolorth. The Octet were unable to defeat Zoggolorth and the city fell. In their retreat, they placed eight magical seals were upon the gates leading to the city. Each gate could only be opened with a magical key.

The outer-most key was created by Fezoon the Cerulean, who in turn entrusted it to Guirn, the nominal leader the dwarfish exiles. In time, the key passed to Guirn's son, Huirn, who used the key to unlock the gate, seeking forgotten treasures left within. Huirn was killed during that expedition and the key passed to Squire Valerius of Duirndown.

Edit to add: I should point out that I had some marvelous help coming up with some of the names above.
#1 was created by Jeff Mason, #3-6 were created by Senator Cybus and #21-24 were created by Michael Tree, both over at RPG.Net. #7 by R.S. Tilton, #8 by Noah Stevens, #9 by Impact Miniatures, and #10 by John Sayler over at the DCC G+ Community, amd #17-20 were by Jeff Low.